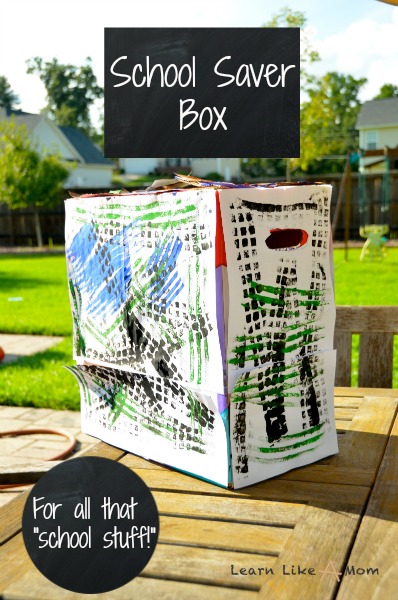
School Saver Box
August 23, 2013 in Creations, Family, Teaching by Anna
While trying to organize part of our house, I saw an empty diaper box and for some reason I thought of all the things I don’t have to deal with right now because my kids aren’t in school.
But, I know many parents are dealing with their children going back to school.
With that, more “stuff” comes in the house.
Papers and projects and some are so cute or cool, you just can’t get rid of them! But where do you put them!?
This school saver box may assist parents with a place to put all that “school stuff.”
This post contains affiliate links, which means if you click through and buy something, I get paid.
This project takes very little time and effort and is full of flexibility.
First of all, you don’t have to use a diaper box, but I like the handles and I like how sturdy it is. Secondly, you can use any paper you want (or none at all). You could use packaging paper, wrapping paper, or newspaper and just wrap it like an empty gift.
When it comes to decorating or labeling it, again…it’s up to you! You can paint it, color it with markers or crayons, or simply label it with the child’s name and grade. If you like what you see above, you could add different colored duct tape on all of the edges of those little gaps are driving you nuts.
What is the purpose of a school saver box?
It basically serves as a storage place for the school year.
You may be asking, “What would I put in there?”
Well, all those things your child brings home, you place on the fridge or counter for awhile, and then you just don’t know where to put them.
Since the slot is cut larger, you can easily slide in regular papers or construction paper containing gluey fun.
In fact, you don’t even seal the box entirely, so you can open the flaps and even put in larger projects from school.
For the papers, I would personally suggest that you invest in a date stamp…you know, the one that has the separate dials for the month, day, and year. Stamp each paper before it goes through the slot.
That way, at the end of the school year, when you revisit the box and its contents, you can organize all the papers by date and then sift through them again to see what you really want to keep and what you would rather discard.
How to Make a School Saver Box
Materials:
One sturdy box (I used a diaper box.)
Sturdy scissors or a boxcutter blade
Paper (scratch paper, newspaper, wrapping paper…your choice)
Tape (double-sided, regular clear, masking, duct…again, your choice)
Decorating Materials (paint, markers, crayons, stickers…your choice)
Steps for the School Saver Box:
Start with an empty box!

Close the top and draw how much you’ll want to cut from the existing gap in the flaps. I cut these two little rectangles off the sides, but then I also cut half an inch from one of the longer flaps to make it a bit wider.
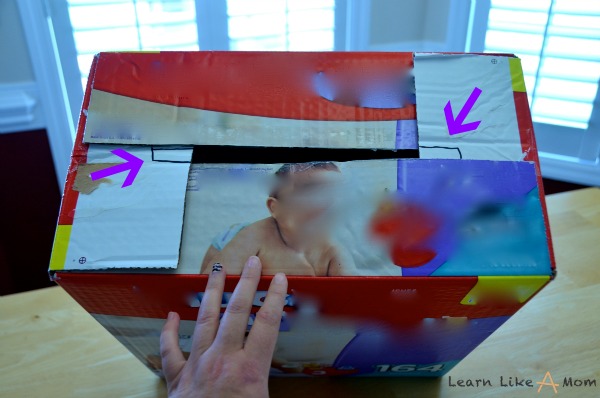
Here is the final slot for the school saver box.

Fold the flaps down together. Don’t seal it with tape or anything, just in case you need to open the box during the school year!
You know kids like to put things in stuff like this…and it doesn’t always belong!
Choose your paper of choice and start cutting it to fit the top of the box.

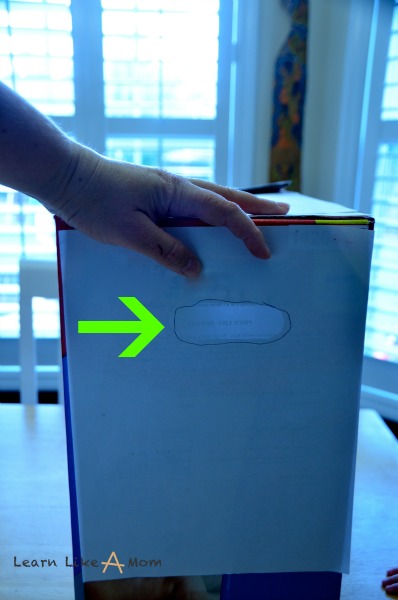
Hold one piece of paper up to the side with the handles. Make a rough stencil of where the handle should be on the paper and then cut out the handle spot. Do this for both sides of the box.
Work your way all over the school saver box, sizing and cutting the paper, and sticking it to the box. (I used scratch paper and double-sided sticky tape.)

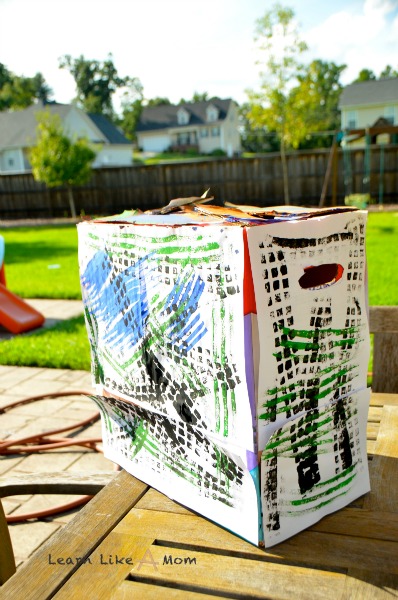
Now comes the fun part! Decorate it! I enlisted the help of my little ones to paint it with various colors of washable paint and foam rollers and brushes.
Looking for a place to store school 'stuff' throughout the year? Here you go! Click To Tweet
Once it’s dry, you have yourself a school saver box for all that school stuff! Now you just have to figure out if you’ll keep this in the kitchen, a closet, or the garage for the year!
If you like this post, you may also like:
First Day of Kindergarten Books
What is the “thing” you have found the hardest to store around your house during the school year?


