Egg Carton Advent Calendar
November 30, 2013 in Creations, Family by Anna
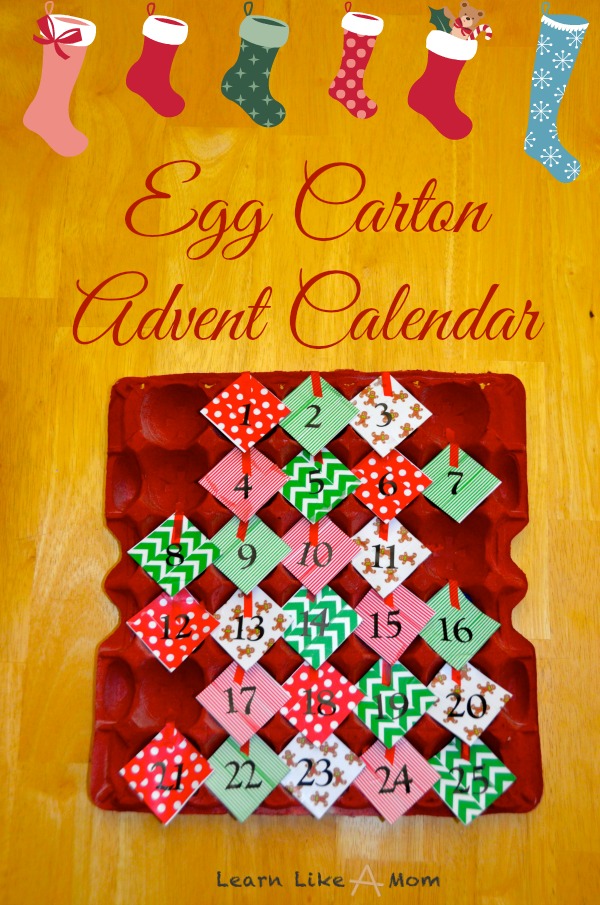
Advent is upon us! This advent calendar is made from materials you might already have around the house which makes it inexpensive as well! A traditional advent calendar has 24 days which represent the 24 days or nights leading up to Christmas morning. Recently, more advent calendars have 25 days. So, I say…When you create your own advent calendar, you can choose whether you want 24 or 25 days! I went with 25 because it fit the design I was looking for.
Each day of advent, your child can uncover an ornament in this calendar. The ornaments here also go together to say something. You can make your ornaments say or appear as you’d like. I will walk you through what I did and then offer ways to make it even easier.
Materials for Advent Calendar
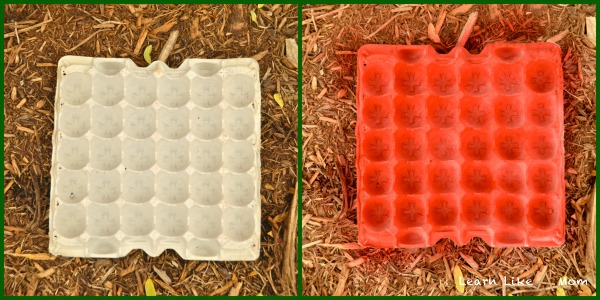
One 30-egg egg carton
Spray Paint
An assortment of washi tape
Card stock
One quarter
Scissors
Liquid Glue
Glitter
A single-hole punch
Ribbon, Yarn, or String
Marker or Number Stickers
Steps to Make an Advent Calendar
1. Spray egg carton with desired color of spray paint, following directions on the can.
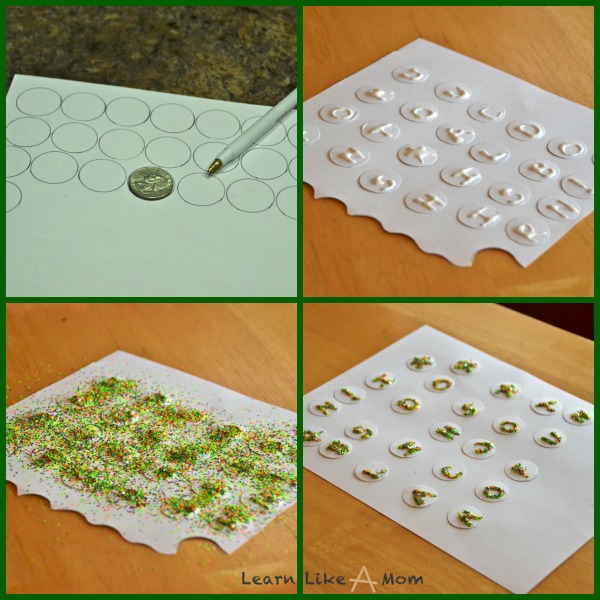
2. Trace a quarter 25 times on card stock.
3. Cut out circles.
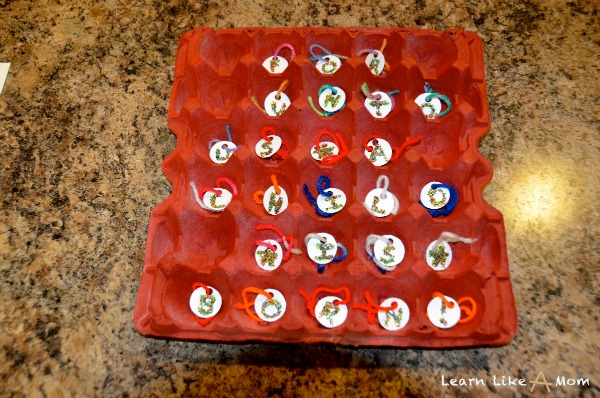
4. Using liquid glue, create designs or write letters on each circle. I wrote “For Unto Us A Child Is Born!” and added 3 stars to make 25 pieces.
5. Sprinkle the circles with glitter and shake off the excess. Allow them to dry completely.
6. Using the hole punch, punch one hole in each circle and tie a loop through the circle with string, yarn, or ribbon. (These are now little ornaments AND a puzzle to complete as your child goes through the advent calendar.)
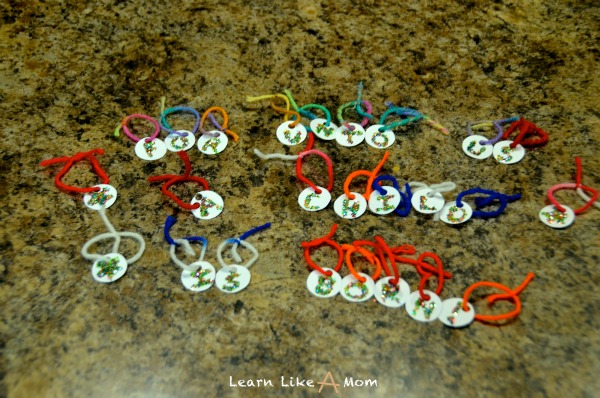
7. Place the ornaments inside the egg carton in the order you’d like your child to receive them.
8. Measure out 1 3/4 inch squares on cardstock and cut out 25 squares.
9. Wrap squares in various washi tape designs.

10. Using thin washi tape or clear tape, and working from bottom right to top left, attach squares to egg carton to cover the ornaments.
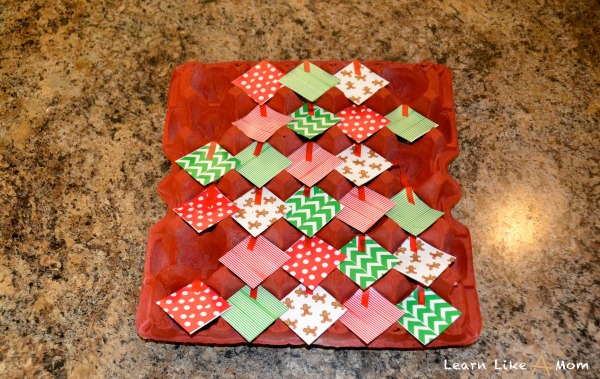
11. Using a marker or number stickers, label the squares from top left to lower right with numbers 1-25.

To make this easier, if you have a circle or square cutter or dicut, you can cut circles and squares that way. If you have holiday scrapbook paper, you can use that for the ornaments or squares. Then you don’t have to decorate the circles or the squares. I used a marker at first to number the squares, but it stopped working on the washi tape, so I used scrapbook number stickers.
The beauty of making things is that you can learn as you go and try it a different way every time!
What is your favorite advent calendar?


[…] Are you looking forward to Christmas this year? If you like to count down to the big day, you may enjoy this egg carton Advent Calendar! […]
[…] Egg Carton Advent Calendar […]